This
is an Tutorial which explains how to make new nebulas for ST Armada 2.
What you need:
3D Studio Max,graphics proggie for
the new sprite “textures” ,Nebula.spr-file to add the nebula sprites and a
bit knowledge about the exporting to SOD
How to start:
first we need a new graphic for our
new nebula, that we use as “texture” for our new nebula
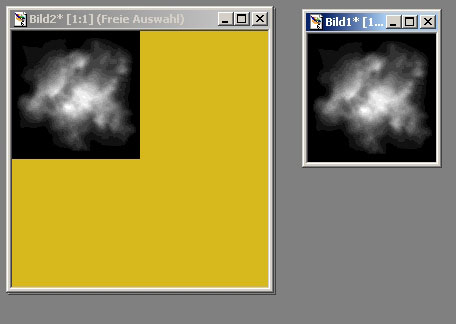
open your graphic editing proggie (I
use PSP 6.02) and create a 256x256 graphic, next use one greyscaled nebula pic
in 128x128 pixel size, copy it into the left upper corner of your 256x256 pixels
texture
next would be to use the 128x128
nebula pic, mirroring it and put it in the upper right corner of the 256x256 pic
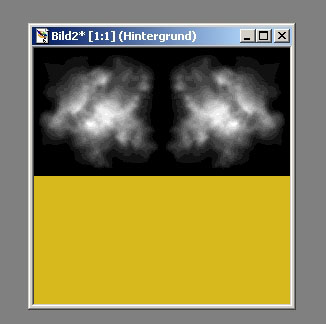
than choose the upper part of the 256x256 pic (that with our first
two nebula pics) copy and paste it as new pic, flip the new pic and copy and
paste it into our 256x256 pic
what we now have should look like
this:
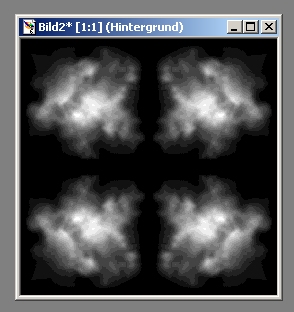
save it as Snewneb.tga (or what you
would name it) to the A2-textures-RGB-folder
now we start with the nebula.spr-file
entries:
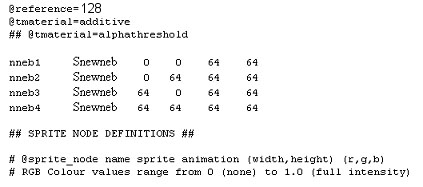
open the nebula.spr-file, with
wordpad or other texteditor and add the lines for the new nebula sprites, that
are as follows:
@reference=128
@tmaterial=additive
##
@tmaterial=alphathreshold
nneb2 Snewneb
0
64 64
64
nneb3 Snewneb
64
0
64 64
nneb4 Snewneb
64
64 64
64
now we need the real sprite node name, for that we have
to placenew lines at the end of the nebula.spr-file, that are:
#
newnebula
@sprite_node
nneb1 nneb1 blue3.colour (200,200) (.1,.1,.2)
billboard
@sprite_node
nneb2 nneb2 blue3.colour (200,300) (.1,.1,.2)
billboard
@sprite_node
nneb3 nneb3 blue3.colour (300,200) (.1,.1,.2)
billboard
@sprite_node nneb4 nneb4 blue3.colour (300,300)
(.1,.1,.2) billboard

now save your changes in the nebula.spr-file and we are
ready for the next step.
Now we would make the SOD in max:
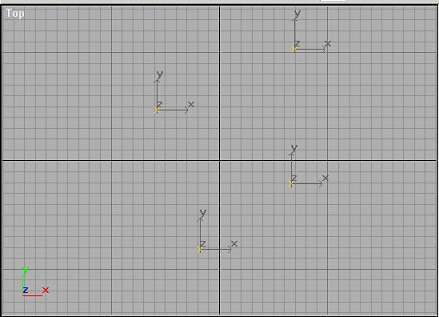
open max and use the helpers option, klick on point and
place a point in the top view-window, rename the point to s_nneb1
you could now place more points that have the names of the other three
sprites
sprite names for points are now:
s_nneb1
s_nneb2
s_nneb3
s_nneb4
take a look at the next pic for more
explanation
now we could export it to the A2 SOD
now open Storm3dViewer and open the
SOD and you should have something like this:

there ya go, the SOD is done now you
have to make the odfs for it and all entry that you need for it to be used
ingame but that would be not explained in this tutorial.
hope that helps you to make new
nebulas or similar mapobjects.
Author of tut: Terradyhne
e-mail:Terradyhne@gmx.de